|
VK Music - Elekit & Triode Japan Forum Welcome! Need support, you got it. Or share your ideas and experiences. |
For Sale Ads |
|
|
VK Music - Elekit & Triode Japan Forum Welcome! Need support, you got it. Or share your ideas and experiences. |
For Sale Ads |
Use this form to submit comments directly to the Asylum moderators for this forum. We're particularly interested in truly outstanding posts that might be added to our FAQs.You may also use this form to provide feedback or to call attention to messages that may be in violation of our content rules.
Original Message
RE:Elekit TU-H80
Posted by vkung on November 1, 2012 at 19:22:53:
Tube Hybrid Amp- available on November 15, 2012
OPtional DAC
[1] TU-H80 Modification
Although TU-H80 was not made for applying other options, there is a space where the PS-3429 can fit.It is easy to install it if a hole in the chassis’ aluminum panel is made, but a head of a screw protruding out of the aluminum panel surface is unsightly since the case is nice and smooth.
Therefore, you can affix it with a sponge-coated tape, but eventually this might come off and cause a short. Because of that, the solution is to fasten a screw without the head protruding. Drill a hole to the speaker terminal and then attached it.It is only the following two types (four total pieces) of modification parts that you need to prepare.
*Small flat head (machine) screws M3×5~10 …2
*Spacers with male and female screws M3×40(~45) …2
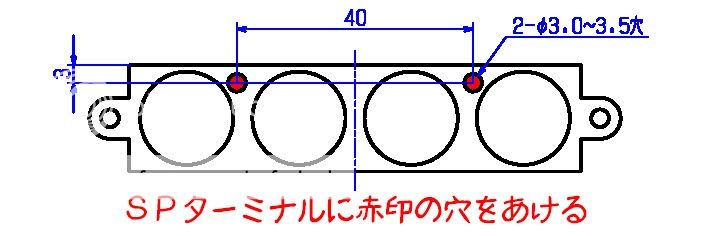
(In the image, four 10mm spacers to make 40mm are connected)(1) Paper pattern for drilling
Click the image and print it out with no reduction or enlargement the size. If it doesn’t print to the actual size, please make reduce or enlarge to proper size.
(Resolution of the picture is set to 150dpi.)
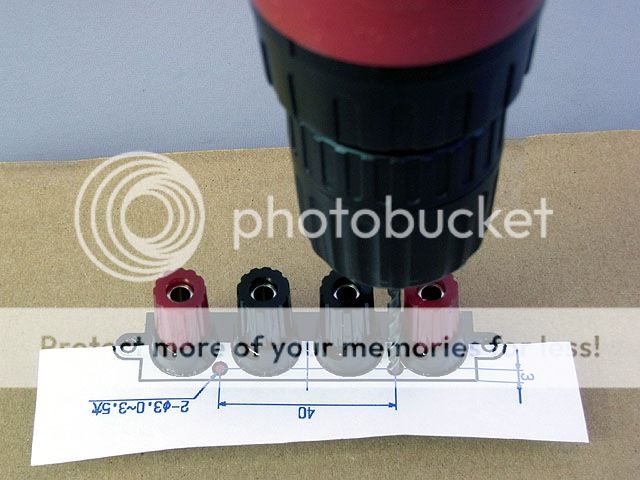
(In the above picture) Drill the holes marked in red to the SP terminal.(2) Cut the paper pattern, place it on the speaker terminal and drill the holes.
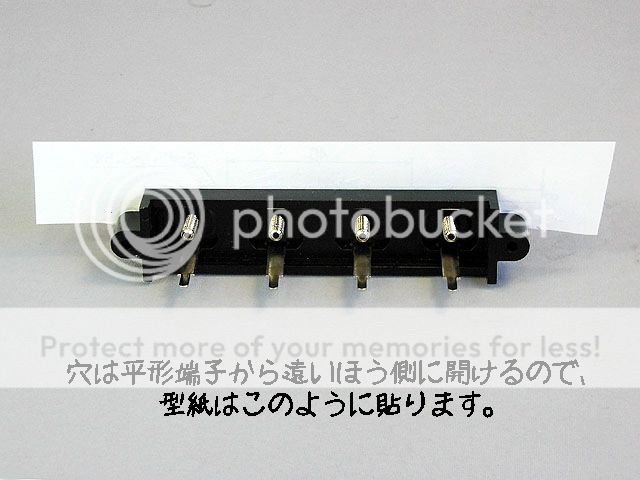
(In the above picture) Place the paper pattern like this because you will need to drill the holes on the side farthest from the flat terminal.
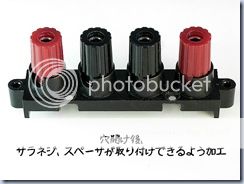
(3)To allow for mounting spacers and countersunk screws, prepare the perimeter of the hole.
(In the above picture) After drilling, process the perimeter of the hole to be able to install countersunk screws and spacers.
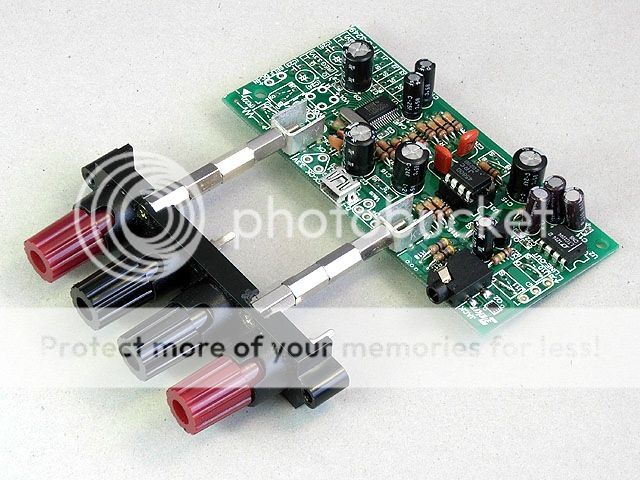
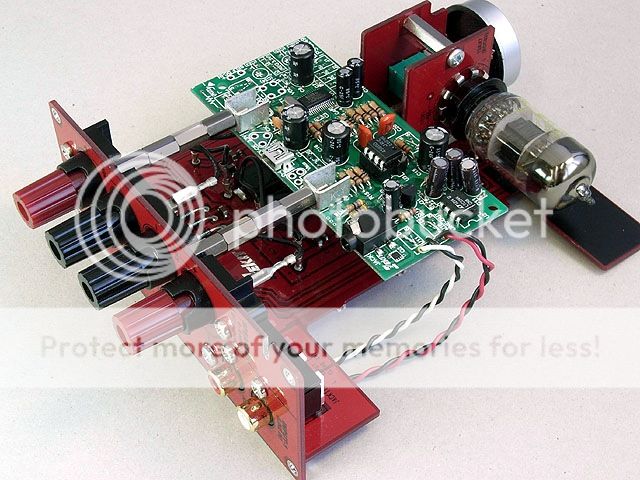
(4)Fix PS-3249 with spacers and countersunk screws, then attach it to H80’s rear panel.
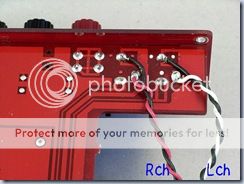
(5)The wiring from the LINE output of PS-3249 is soldered to the terminal of H80’s RCA jack. If it is connected as follows when you pull out from a jack it will change to USB-DAC automatically.
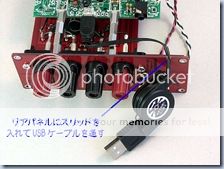
(5) A USB terminal doesn’t come out on the panel. What shall I do?
I took an easy way here. I was able to buy reel-type mini BUSB cable at a100 yen store, so I drew it out of the rear panel.
(In the above picture) Put a slit in the rear panel and feed a USB cable through the slit.
After this, it will be done if H80 is set in an aluminum case as before.