 |
Audio Asylum Thread Printer Get a view of an entire thread on one page |
For Sale Ads |
|
|
Audio Asylum Thread Printer Get a view of an entire thread on one page |
For Sale Ads |
97.95.43.235
In Reply to: RE: Zenith Moderne Z565 - Loud, buzzy amp posted by gsdproductions@yahoo.com on May 09, 2016 at 23:28:46
Yes
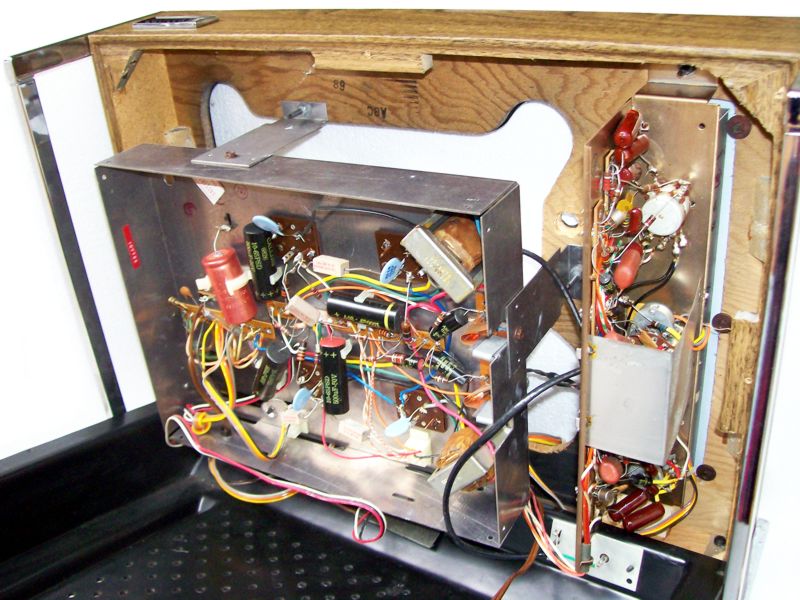
You have a bad filter cap in the power supply or didn't ground one properly if you replaced it or if the filter cap is bad..Take it apart and show us what you replaced..What your are getting is power supply hum because when you turn the volume down,the buzz is still there,right? If the hum is on both channels,its a 99% chance it's a bad filter cap.Does this look like your unit underneath?
A friend you get for nothing,an enemy has to be bought
Edits: 05/10/16Follow Ups:
That's what it looks like exactly.I didn't mess with anything electrical, aside from reconnecting the platter harness which had come undone. I replaced the idler wheel, the vibration dampers on the motor, Opened up and lubricated the motor, changed the needle and cleaned and lubricated the mechanical parts.
The rear connector panel is a mess, but it's all original. I plan on replacing it as well, but I haven't tampered with anything related to the power supply or the amplifier.
The buzz is still present with the volume all the way down, yes. Also the audio being played is still relatively loud. Through headphones much more so, and with a more pronounced hum.
Are there any photos I can get for you that would be helpful?
Edits: 05/10/16 05/10/16
That is definitely a filter cap gone bad..Those units actually sound very good for what they are..I remember servicing a couple of those when I was in college in the late 70s.The round speakers that come with it are the pre allegro series which were pretty good as far as clarity goes.
Now if you can solder,you can fix this unit..If you can take a better photo than I found on the unit underneath,that would help.We just need to see the caps to change and they are very easy to change in this unit.I see little output transformers and bumblebee capacitors and this isn't a tube unit as I recall.
A friend you get for nothing,an enemy has to be bought
Edits: 05/10/16
I can solder, I just don't know what these would be replaced with.
The Spec sheet

The capacitors from below

Edits: 05/10/16 05/10/16 05/10/16 05/10/16 05/10/16 05/11/16

Change the capacitors I have circled ..Some are 1000uf at 50v and some are 100uf at 50v and then you have a small one that looks like crud is coming out of it..You can buy all these capacitors for 35 dollars or less.I think there is one more below the two yellow ones but can't be sure..We can help you find these caps but your unit will sound as good or better than when it was new possibly.
A friend you get for nothing,an enemy has to be bought
I'll start ordering. Thank you so much. I'm excited to give this a shot.
If your not that experienced,change one or two at a time and then test..Now keep in mind that you can use higher in voltage caps and even uf value if you want..Some say 1000uf at 30v..I would get 1000 at 50v or even a 100v because the new capacitors are physically smaller in size than when the unit was made.Also,if you look to the right of the cap I put the red rectangle around,there is a little resistor that looks like it has a red red black stripe, that reisistor is 22 ohms.Check that with your ohmmeter to see that it isn't open or burnt.You can grab the body of that resistor and pull up on it to see if it is burned in two.
A friend you get for nothing,an enemy has to be bought
Edits: 05/11/16
Is physical size important just to get the leads where they're going, or is there something else?
No you can extend them or just leave some length on the old leads and solder to them..Even if you get radial caps which are cheaper,they will work fine..Check that resistor tho,the 22 ohm.
A friend you get for nothing,an enemy has to be bought
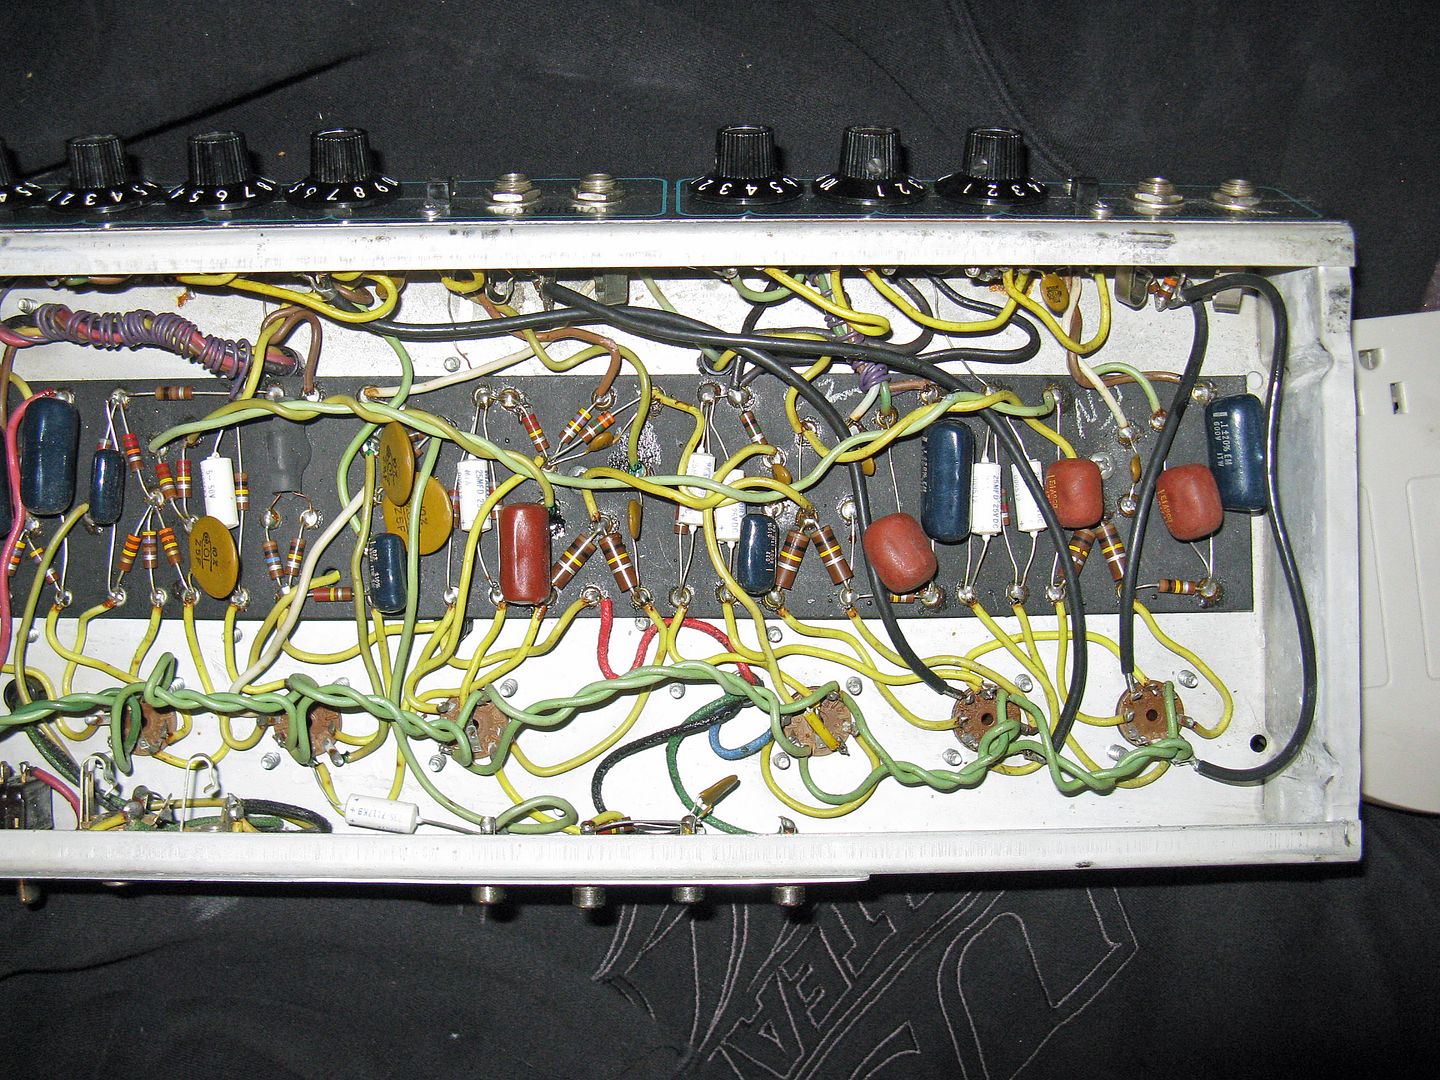
I recorded all the resistors and capacitors. and traced all wires.
Some of them had a light sticky residue on them, but nothing looks like it's in particularly bad shape.
When I looked up the resistors, I found that they still make those exact ones and they're relatively common, but I haven't found any cylindrical capacitors with the same form factor.
So you're saying something like this will work fine?

Those caps are fine to use.
A friend you get for nothing,an enemy has to be bought
Awesome.
One final question and I swear I will leave you alone.
Do you know what these are?

Common in mid 1970-1980s vintage tube amps. Not the greatest. Prolly ok to keep in unit, for now.Just do the electrolytic caps, first. Worry about the non-polar coupling caps, after you get the unit working --- with no more buzzing.
Photo of 1971 Fender Vibrolux reverb with brown and blue blob non-polar coupling caps.
good luck!
Edits: 05/15/16 05/15/16
I finally got into this this last night.Most of the junctions are as shown in the photo below. They are deep pits, raised and crimped on the other side. Multiple component leads were jammed deep into the pits, crimped on the back, then pit filled with solder.
Because of the depth and the amount of solder used, It's taking significant heat to melt sufficiently to remove the leads. I'm concerned that I'm cooking the components themselves by using such intense heat.
Also, there is so much old solder that it's incredibly difficult to clean it away. Is it necessary to remove all of it? I've read that it can lead to poor connections.
Finally, many junctions, when heated, produce a pinkish liquid that boils out of the pit or the solder junction. I'm not sure if this is a runoff residue from old resistors/capacitors, old flux, or some other material. I'm also concerned about this material spoiling connections.
The problem is, to entirely clean out all of the solder, or to try to absolutely remove all pink goo, I'd have to heat each pit intensely and for long intervals. I think that would bake everything to a crisp.
Do you have any thoughts?

Edits: 06/22/16
Those old Zenith's with the junction posts were actually machine soldered, and trying to unsolder the posts is very difficult. I'd just cut the old component out, leaving enough of the old lead so you can twist the new lead onto it. Then just solder at that junction.
Also, apparently Sanyo's had the same logo since at least 1969. That's pretty amazing.
The layout is very confusing. I'd do one cap exchange, at-a-time.
Ramp-up the unit with a Variac or current-limiting lamp, the first time. Just to be sure the polarities are correct.
Good luck!
Will do. Thank you for the heads up.
Post a Followup:
| FAQ |
Post a Message! |
Forgot Password? |
|
||||||||||||||
|
||||||||||||||
This post is made possible by the generous support of people like you and our sponsors:
